
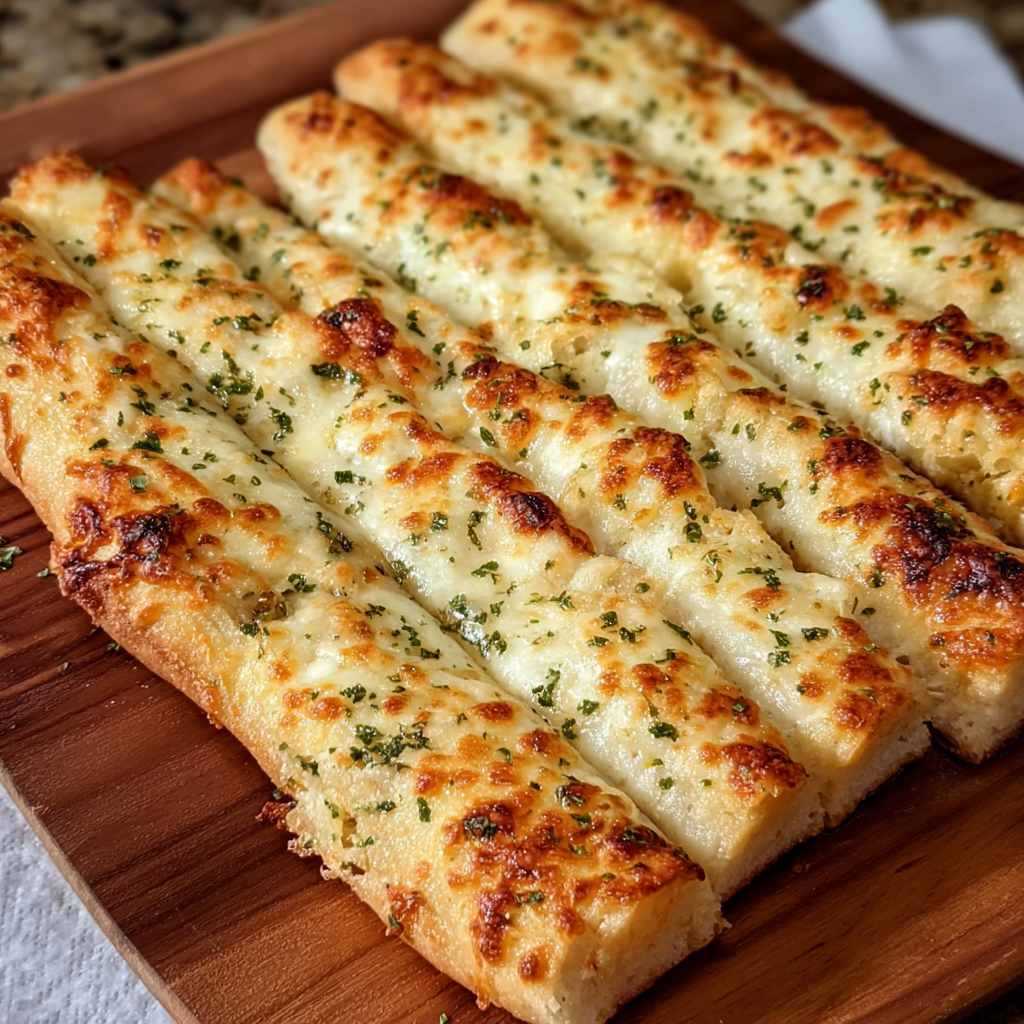
Homemade Cheesy Garlic Breadsticks

Soft, cheesy garlic breadsticks with a golden crust — perfect for weeknight dinners, game day, or an easy side that everyone will love.

This batch of cheesy garlic breadsticks is one of those recipes that immediately became a go-to in my kitchen. I discovered it on a rainy Saturday when I had a craving for warm bread and gooey cheese but only pantry staples on hand. The dough is straightforward and forgiving, the garlic butter brings bright savory flavor, and the mozzarella stretches just the way you want it. I remember pulling a tray out of the oven for a family movie night — the house filled with the smell of toasted crust and garlic, and my kids raced to claim the first warm stick. It’s comfort food with a crowd-pleasing smile.
What I love most is how adaptable the method is: you can make the dough by hand, use a stand mixer, or even let it rise more slowly in the fridge overnight. The texture balances a slightly crisp exterior and tender, pillowy interior, while the cheesy interior provides that unmistakable melty pull. This version uses simple, quality ingredients — good olive oil, fresh garlic, and a mix of mozzarella and Parmesan — for an authentic, bakery-style result you can make in your own kitchen.
Why You'll Love This Recipe
- Minimal fuss: active preparation is only about 20 minutes, and most of the time is hands-off while the dough rises, making it a great option for busy weeknights.
- Pantry-friendly: uses common staples like all-purpose flour, active dry yeast, olive oil, garlic, and shredded mozzarella — nothing exotic required.
- Crowd-pleasing: melts beautifully and appeals to kids and adults alike; great for parties, game days, or as a side to spaghetti or salad.
- Make-ahead friendly: dough can be mixed the night before and refrigerated for a slow rise, saving time on the day you bake.
- Flexible servings: easily scales up for larger crowds or down for two, and you can switch cheeses or add herbs to suit dietary preferences.
- Quick bake time: ready in under 90 minutes from start to finish, including a one-hour rise and a 15 to 20 minute bake.
In my kitchen this recipe became a quick fix for last-minute guests and a favorite for holiday sides. My partner calls these the ultimate comfort food — warm, cheesy, and dipping-ready — and our neighbors once asked for the recipe after I shared a tray at a block party. Small tips like using warm water (not hot) and letting the dough rest without drafts made all the difference for a consistent rise.
Ingredients
- Warm water: 1 1/2 cups of water warmed to about 105 to 115°F. The water should feel warm to the touch but not hot — this wakes up the yeast without killing it.
- Active dry yeast: 2 teaspoons. I often use SAF or Fleischmann’s for reliable results; make sure it’s within its best-by date for the best rise.
- Sugar: 1 teaspoon. Just a small amount to help the yeast get going and improve browning.
- All-purpose flour: 4 cups. Use a spoon-and-level method for accuracy; King Arthur or Bob’s Red Mill work well here.
- Salt: 2 teaspoons. Fine sea salt or kosher salt will both do — salt strengthens gluten and seasons the dough.
- Olive oil: 4 tablespoons. A good extra-virgin gives flavor; save a tablespoon for brushing after baking if you like extra shine.
- Garlic, minced: 4 cloves. Fresh garlic is key for bright flavor; press or finely mince to infuse the butter.
- Butter, melted: 2 tablespoons. Combined with the garlic for basting the dough before and after baking.
- Mozzarella cheese, shredded: 2 cups. Whole-milk mozzarella melts best; pre-shredded works in a pinch but may contain anti-caking agents.
- Parmesan cheese, grated: 1/4 cup. Use finely grated Parmigiano-Reggiano for a salty, nutty finish.
- Fresh parsley, chopped: To garnish and add a fresh herbal note.
Instructions
Activate the yeast: In a small bowl, combine 1 1/2 cups warm water (105–115°F), 2 teaspoons active dry yeast, and 1 teaspoon sugar. Stir gently and let sit for 5 to 10 minutes until the mixture becomes frothy and slightly foamy. If it doesn’t foam, the yeast may be dead — start over with fresh yeast and water at the right temperature. Mix the dough: In a large bowl, whisk together 4 cups all-purpose flour and 2 teaspoons salt. Make a well and add the yeast mixture and 4 tablespoons olive oil. Mix with a wooden spoon until a shaggy dough forms, then turn onto a floured surface and knead for 6 to 8 minutes until smooth and elastic. Alternatively, use a stand mixer with a dough hook on medium speed for 4 to 6 minutes. First rise: Lightly oil a clean bowl, place the dough inside, cover with a damp towel or plastic wrap, and let rise in a warm, draft-free spot for about 1 hour, or until doubled in size. A slightly warmer environment will speed the rise; cooler will slow it — both are fine as long as the dough doubles. Prepare garlic butter: Combine 4 cloves minced garlic with 2 tablespoons melted butter in a small bowl. Reserve about 1 tablespoon for brushing after baking. This garlic butter will be used to flavor the dough before and after baking. Shape and fill: Preheat the oven to 425°F and line a baking sheet with parchment paper. Turn the risen dough onto a lightly floured surface and roll into a roughly 12x8-inch rectangle. Brush the surface evenly with the garlic butter, leaving a small border. Sprinkle 2 cups shredded mozzarella across the surface, then tightly roll the dough into a log. Using a sharp knife, cut the log into 10 to 12 even slices and place them cut-side down on the prepared sheet, spaced slightly apart. Bake: Bake in the preheated oven for 15 to 20 minutes until the crust is golden brown and cheese is melted. Rotate the pan halfway through baking for even color. Visual cues: the tops should be golden with slightly darker edges and the interior should sound hollow when tapped lightly. Finish and serve: Brush the warm breadsticks with the reserved garlic butter, then sprinkle with 1/4 cup grated Parmesan and chopped fresh parsley. Serve immediately while warm with marinara or your favorite dip.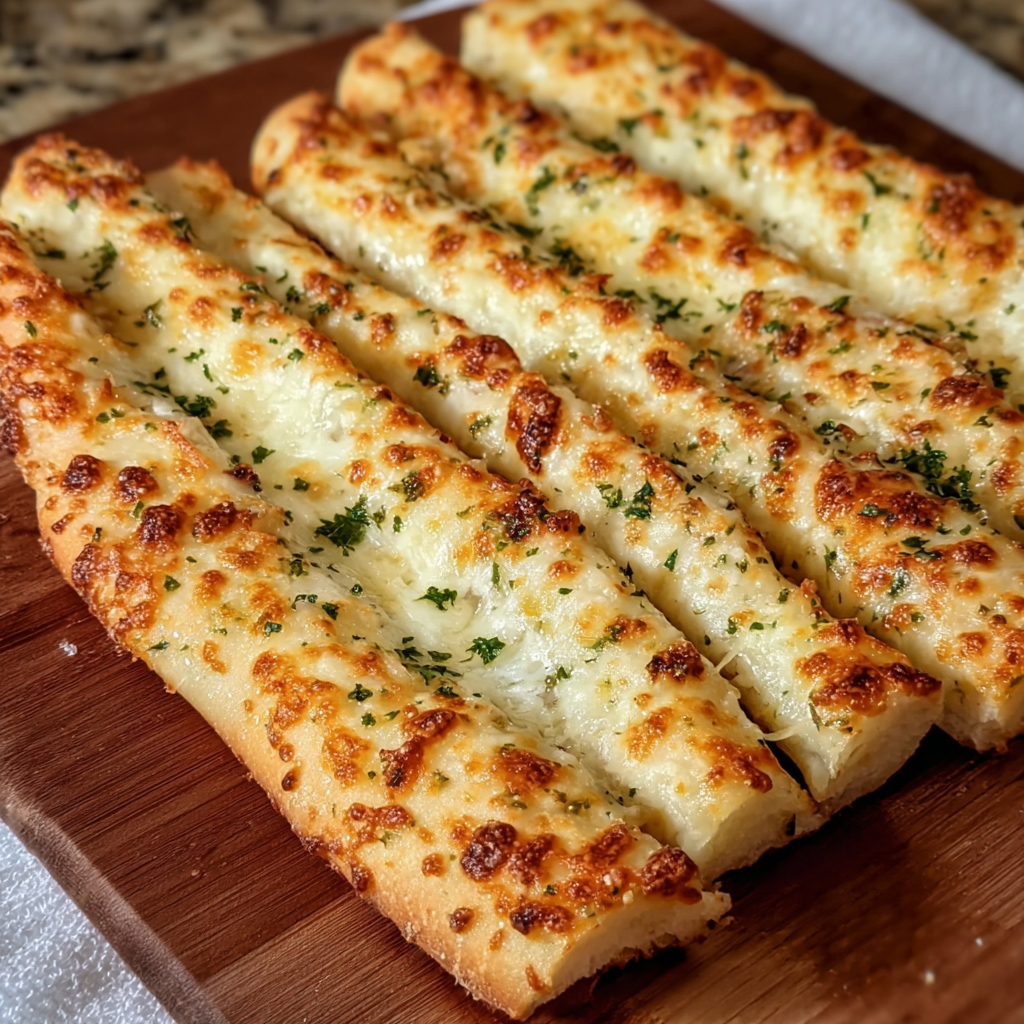
You Must Know
- Storage: These keep well refrigerated for up to 3 days in an airtight container. To freeze, wrap individual sticks and freeze up to 3 months; reheat at 350°F for 10 to 12 minutes from frozen.
- Nutrition note: Each stick is calorie-dense due to butter and cheese; pair with a green salad to balance the meal.
- Yeast care: Always proof in warm water (105–115°F). Water that’s too hot will kill yeast, too cool will slow the rise dramatically.
- Cheese melt: Use whole-milk mozzarella for best melt and flavor. Low-moisture, part-skim will still work but may be less creamy.
- Make-ahead option: After shaping, place the tray covered in the fridge overnight; bake the next day, adding 5–7 minutes to bake time from cold.
My favorite part of this method is the thrill of the first pull — the cheese strings and warm garlic steam. A reader once told me they make a double batch every Sunday for the week ahead; their family snacks on them with soup, and they reheat beautifully in the oven or toaster oven for a quick comfort meal.
Storage Tips
To maintain texture, cool the breadsticks completely before refrigerating. Store in an airtight container or tightly wrapped foil for up to 3 days. For longer storage, freeze individual breadsticks on a baking sheet until solid, then transfer to a freezer bag for up to 3 months. Reheat from frozen on a sheet pan at 350°F for 10 to 12 minutes, or thaw overnight in the refrigerator and warm for 6 to 8 minutes. Avoid microwaving for extended periods, which can make the crust soggy; instead, use the oven or a toaster oven for crispiness.
Ingredient Substitutions
If you need to swap ingredients, here are reliable options: for a lighter oil flavor use vegetable oil instead of olive oil, though you’ll lose some fruity notes. Replace mozzarella with provolone or fontina for a nuttier melt. For a dairy-free version, use vegan butter and dairy-free shredded cheese, though melting characteristics will differ. To make a whole wheat variation, substitute up to half the all-purpose flour with whole wheat flour and add an extra tablespoon of water to maintain hydration. Note that whole wheat will yield a denser crumb.
Serving Suggestions
Serve warm as a side to pasta, a hearty salad, or bowl-based meals. They are ideal with marinara dipping sauce, garlic aioli, or a balsamic-herb oil. For an elevated appetizer tray, slice smaller pieces and top with a sprinkle of red pepper flakes, fresh basil, or a drizzle of good olive oil. These breadsticks also pair beautifully with soups like tomato bisque or minestrone for a comforting weeknight dinner.
Cultural Background
While the concept of garlic bread is rooted in Italy’s tradition of using bread with olive oil and garlic, the cheesy stuffed or topped variations are an Americanized evolution that make use of mozzarella and Parmesan for melting and savory depth. This particular pull-apart style combines classic breadmaking techniques with a stuffed-roll approach commonly found in home-style American and Italian-American kitchens. Each region has its own spin — from garlic knots to cheesy twists — reflecting local tastes and ingredient availability.
Seasonal Adaptations
Adapt the flavors to the season: in summer add chopped sun-dried tomatoes and fresh basil to the cheese; in autumn mix in roasted garlic and thyme; in winter fold in crumbled cooked bacon and chives for a heartier stick. For holidays, sprinkle with flaky sea salt and finely grated aged Parmesan, or add festive herbs like rosemary. Small changes in herbs and add-ins transform this base into a seasonal centerpiece.
Meal Prep Tips
To meal-prep, make a large batch and freeze portions individually. Shape and slice the rolls, flash-freeze on a sheet pan, then transfer to freezer bags. Label with date and bake from frozen when needed. Alternatively, keep baked sticks in the refrigerator for up to 3 days and reheat in the oven for 6 to 8 minutes at 350°F. Pack with a small container of marinara for lunches or as a side for packed dinners.
These cheesy garlic breadsticks are simple to make, endlessly adaptable, and reliably adored by anyone who tries them. Give them a try, tweak the fillings to match your pantry, and enjoy the warm, comforting results shared around the table.
Pro Tips
Use water at 105–115°F to proof yeast; too hot will kill it, too cool will slow the rise.
For the best melt, use whole-milk mozzarella and grate your own cheese when possible.
To keep the crust crisp when reheating, use an oven or toaster oven rather than a microwave.
Let the dough rise in a warm, draft-free spot and avoid moving it too much during the first rise.
If you want a shinier finish, brush with a little extra-virgin olive oil after baking instead of more butter.
This nourishing homemade cheesy garlic breadsticks recipe is sure to be a staple in your kitchen. Enjoy every moist, high protein slice — it is perfect for breakfast or as a wholesome snack any time.
FAQs about Recipes
What if the yeast doesn't activate?
If the yeast doesn't foam during proofing, replace it and ensure the water is between 105 and 115°F.
Can I make these ahead of time?
Yes. Once baked and cooled, store in an airtight container in the refrigerator for up to 3 days or freeze for up to 3 months.
Tags
Homemade Cheesy Garlic Breadsticks
This Homemade Cheesy Garlic Breadsticks recipe makes perfectly juicy, tender, and flavorful steak every time! Serve with potatoes and a side salad for an unforgettable dinner in under 30 minutes.
Ingredients
Dough
Garlic Butter
Cheese & Finish
Instructions
Activate the yeast
Combine warm water, active dry yeast, and sugar in a small bowl. Stir and let sit 5 to 10 minutes until foamy.
Mix the dough
Mix flour and salt in a large bowl, add yeast mixture and olive oil, then knead by hand 6 to 8 minutes or in a stand mixer 4 to 6 minutes until smooth.
First rise
Place dough in an oiled bowl, cover, and let rise in a warm spot for about 1 hour or until doubled in size.
Prepare garlic butter
Mix minced garlic with melted butter and reserve a tablespoon for brushing after baking.
Shape and fill
Roll dough into a rectangle, brush with garlic butter, sprinkle with shredded mozzarella, roll into a log, slice into 10–12 pieces, and place on a parchment-lined sheet.
Bake and finish
Bake at 425°F for 15–20 minutes until golden, brush with remaining garlic butter, sprinkle Parmesan and parsley, then serve warm.
Last Step: Please leave a rating and comment letting us know how you liked this recipe! This helps our business to thrive and continue providing free, high-quality recipes for you.
Nutrition
Did You Make This?
Leave a comment & rating below or tag
@magicmealideas on social media!
Categories:
You might also like...

Air-Fried Pizza Rolls
Crispy on the outside, gooey on the inside: easy air-fried pizza rolls made with pizza dough, mozzarella, pepperoni, and a quick Italian seasoning — perfect for snacking or feeding a crowd.
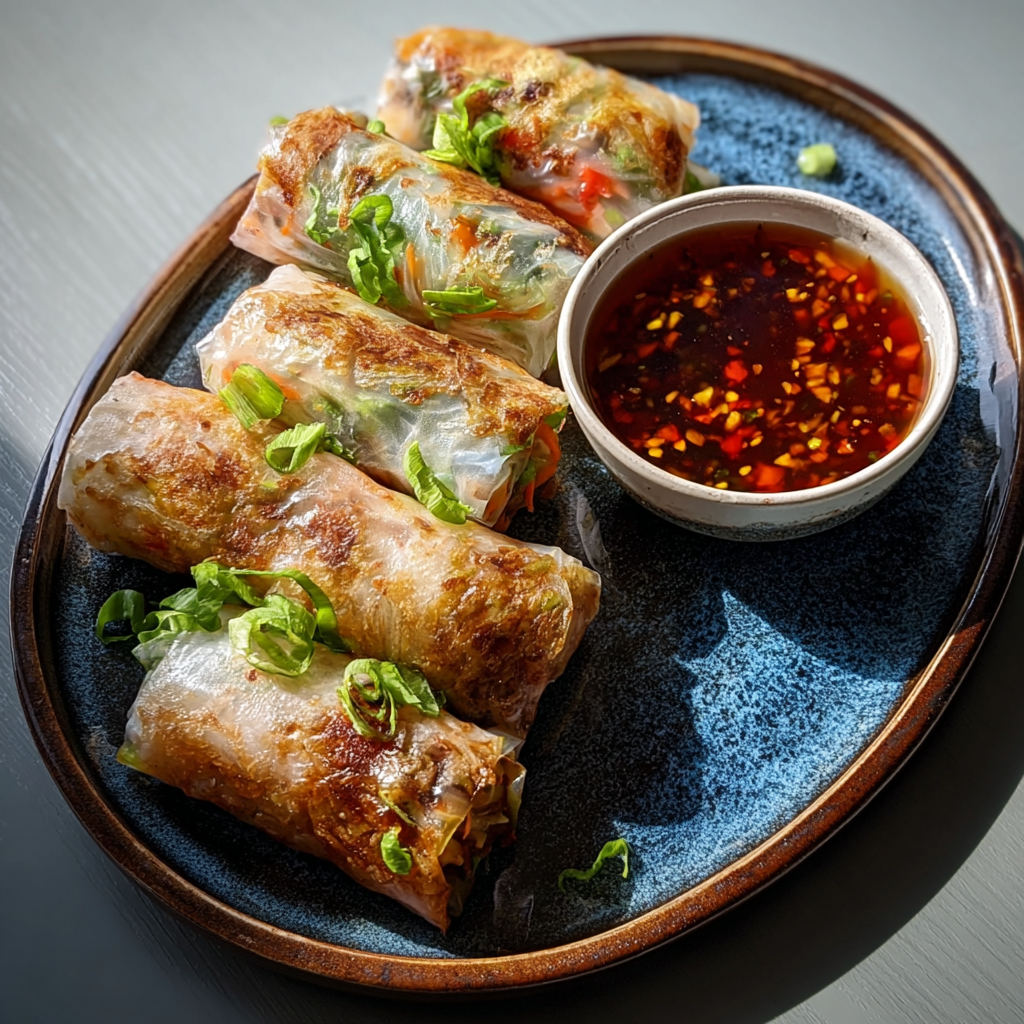
Air-Fried Rice Paper Noodle Rolls
Crispy, light rice paper rolls filled with vermicelli, vegetables and tofu or shrimp, air-fried to golden perfection for a healthy snack or shareable appetizer.

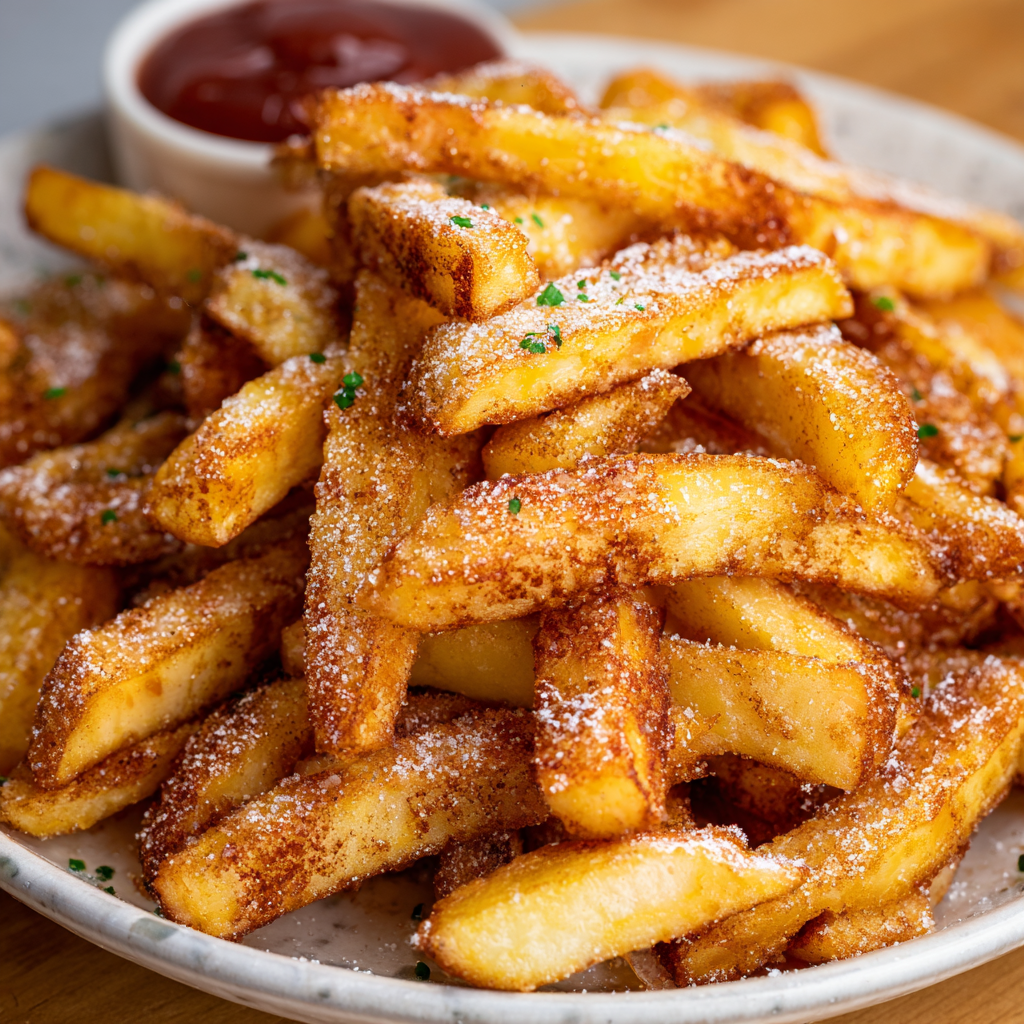
Air Fryer Apple Fries
Crispy, cinnamon-sugar coated apple sticks made in the air fryer — a quick, family-friendly treat that tastes like baked apple pie in every bite.
Did You Make This?
Leave a comment & rating below or tag @magicmealideas on social media!
Rate This Recipe
Share This Recipe
Enjoyed this recipe? Share it with friends and family, and don't forget to leave a review!
Comments (1)
This recipe looks amazing! Can't wait to try it.
Comments are stored locally in your browser. Server comments are displayed alongside your local comments.
Hi, I'm Chef!
What's Popular
30-Minute Meals!
Join to receive our email series which contains a round-up of some of our quick and easy family favorite recipes.