
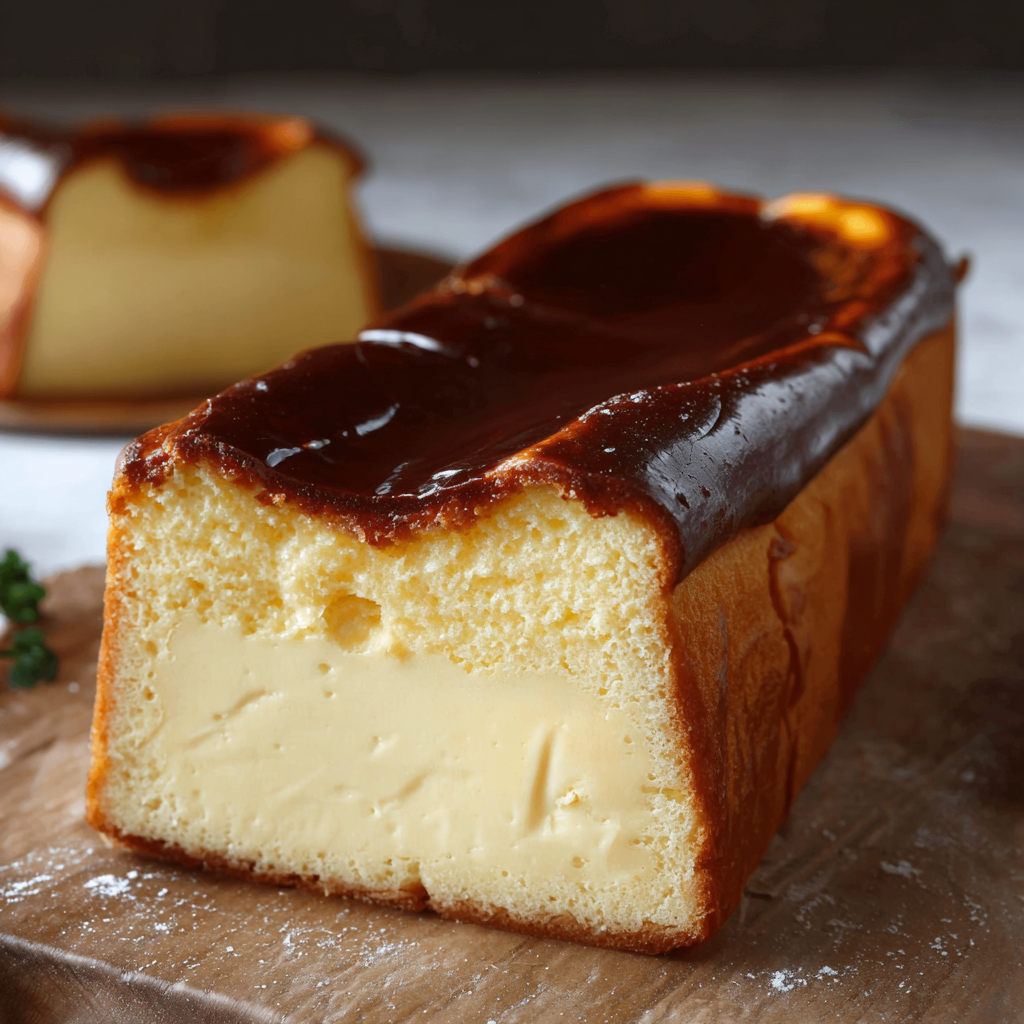
Luxury Burnt Basque Cheesecake in a Loaf Pan

A silky, deeply caramelized Basque-style cheesecake baked in a loaf pan for an elegant, sliceable dessert topped with whipped cream, fresh berries, and caramel.

This luxury burnt Basque cheesecake in a loaf pan is my answer to elegant entertaining when I want dramatic flavor without fuss. I first developed this loaf version during a small dinner party when I needed a show-stopping dessert that could be sliced and plated easily. The result was a deeply caramelized top, a lusciously creamy interior, and a texture that sits somewhere between traditional cheesecake and a light custard. It quickly became my signature finish to weekend menus and a dessert guests ask about long after the last bite.
What makes this version special is the balance of simplicity and indulgence. Using full-fat cream cheese and heavy cream delivers a satin mouthfeel while baking at high heat creates the characteristic burnt top with complex toffee notes. Baking in a loaf pan concentrates the center so each slice is tall and composed, perfect for plating with whipped cream, fresh berries, or a ribbon of caramel. I love how the crustless sides and darkened surface contrast with the pale, creamy interior when you slice into it.
Why You'll Love This Recipe
- This version is ready with about one hour of oven time and minimal hands-on work, making it ideal for entertaining or a relaxed weekend treat.
- It uses pantry-friendly ingredients you likely already have: cream cheese, sugar, eggs, cream, and a small amount of flour.
- Baking in a loaf pan produces neat, tall slices that are easier to plate than the classic round cake and perfect for make-ahead service.
- The burnt, deeply caramelized top adds toasted, almost bittersweet notes that cut through the richness for excellent balance.
- Flexible toppings let you tailor the dessert: fresh berries for brightness, whipped cream for silkiness, or caramel for extra luxury.
- Can be adapted to gluten-free diets by using a 1-to-1 measure-for-measure gluten-free flour substitute.
I remember the first time I served this loaf: a friend closed her eyes after the first bite and said it tasted like a restaurant dessert. My family always asks for seconds, and because the slices hold their shape so well, this has become my go-to for small dinner parties and holiday gatherings. The recipe taught me that a little high heat and patience produce that coveted contrast between a caramelized top and molten center.
Ingredients
- Full-Fat Cream Cheese (16 oz): Use a quality block-style cream cheese such as Philadelphia for best texture. Bring to room temperature so it blends smooth without lumps; this ensures an ultra-silky interior.
- Granulated Sugar (3/4 cup): Dissolves into the batter to sweeten and help create a glossy surface. Caster sugar works well if you have it, but regular granulated is fine.
- Large Eggs (3): Room temperature eggs incorporate more easily and stabilize the custard. Use large eggs for consistent structure; whisk lightly before adding.
- Heavy Cream (1 cup): Full-fat cream gives richness and a smooth mouthfeel. You can substitute a lighter cream, but the texture will be less luxurious.
- All-Purpose Flour (1/4 cup): A small amount to lend structure and prevent cracking. For gluten-free diets, swap a 1-to-1 gluten-free flour blend.
- Salt (1/4 teaspoon): Enhances the sweetness and highlights the dairy flavors; use fine sea salt for balanced seasoning.
- Optional Toppings: Whipped cream (1 cup), fresh berries (1 cup), and caramel sauce (1/2 cup) to serve. These add contrast and elevation for an indulgent presentation.
Instructions
Prepare the Loaf Pan and Oven: Preheat oven to 450°F. Line a 9x5-inch loaf pan with a single sheet of parchment, leaving a generous overhang to remove the cake easily. Ensure the parchment extends above the rim so the batter can rise slightly and the edges can darken without sticking. Beat the Cream Cheese and Sugar: In a large bowl, beat room-temperature cream cheese with sugar until smooth and free of lumps. Use a handheld mixer or stand mixer on low to medium speed; scrape the bowl often. This step is crucial for a lump-free texture. Add Eggs One at a Time: Mix in eggs one at a time, fully incorporating each before adding the next. This prevents the batter from breaking and keeps the emulsion stable, which helps create the custardy interior. Incorporate the Cream: Pour in the heavy cream and mix until just combined. Avoid overbeating once the cream is added to prevent incorporating excess air that can cause cracking during baking. Fold in Flour and Salt: Sift the flour and salt over the batter and fold gently with a spatula until no streaks remain. A brief, gentle fold keeps the batter dense and creamy, ideal for the Basque texture. Transfer and Bake: Pour batter into the prepared loaf pan. Bake at 450°F for 20 minutes to encourage a deeply caramelized surface, then reduce oven to 350°F and bake another 25 to 30 minutes. The top should be dark brown and blistered while the center remains slightly jiggly when shaken. Cool and Chill: Allow the loaf to cool on a wire rack to room temperature, then refrigerate at least 4 hours, preferably overnight. Chilling firms the texture and improves sliceability. Unmold and Serve: Use the parchment overhang to lift the cake from the pan. Slice with a warm, clean knife for neat slices. Serve with whipped cream, fresh berries, and a drizzle of caramel sauce as desired.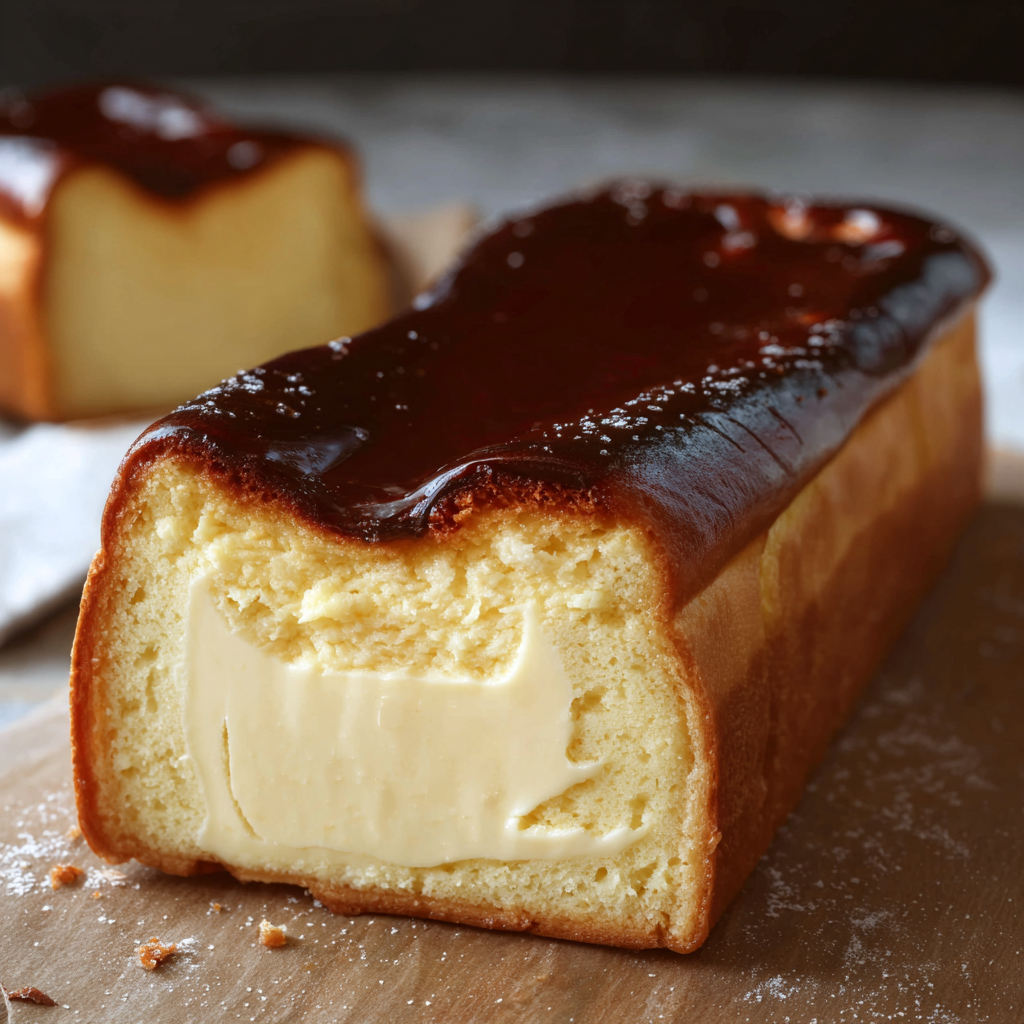
You Must Know
- The dark, burnt top is intentional and delivers toasted, caramelized flavors that contrast the creamy interior.
- Chill the loaf for at least 4 hours so it sets properly; overnight chilling yields clean slices and improved flavor melding.
- This keeps in the refrigerator for up to 4 days in an airtight container and freezes well for up to 3 months wrapped tightly in plastic and foil.
- If using gluten-free flour, use a measure-for-measure blend and check for added starches that may alter texture slightly.
- High oven temperature is key to forming the characteristic scorched surface; watch closely in the final minutes to avoid burning beyond flavor.
My favorite thing about this loaf is how the burnt top sings on the palate while the interior remains silky. Family and friends often comment on the texture, saying it is lighter than a traditional cheesecake yet indulgent. It travels well to potlucks and looks elegant when plated with a few berries and a ribbon of warm caramel. Over time I refined the timing so each slice comes out glossy and tall with minimal cracking.
Storage Tips
Store cooled slices in an airtight container in the refrigerator for up to four days. To preserve the caramelized surface, place layers between parchment to avoid sticking. For longer storage, freeze individual slices on a tray until firm, then wrap tightly in plastic and foil; thaw in the refrigerator overnight before serving. Reheat gently with a warm knife or let slices come to room temperature for 20 minutes for optimal creaminess.
Ingredient Substitutions
For a lighter version, replace half of the heavy cream with whole milk, though the texture will be slightly less rich. To make gluten-free, use a 1-to-1 gluten-free flour blend for the 1/4 cup of all-purpose flour. You can substitute part of the sugar with brown sugar for a deeper toffee note, but that will darken the top more during baking. For dairy-free and vegan adaptations, consider silken tofu and plant-based cream alternatives, but expect a different texture and flavor profile.
Serving Suggestions
Serve thick slices at room temperature with a dollop of freshly whipped cream and a scattering of seasonal berries for brightness. A light drizzle of warm caramel or salted caramel enhances the burnt top and adds shine. For a modern plated dessert, add a mint sprig and a dusting of powdered sugar around the plate. Pair with espresso or slightly sweet dessert wine to balance the richness.
Cultural Background
The burnt Basque style originated in the Basque Country of Spain, celebrated for its intentionally scorched exterior and creamy interior. Traditionally baked in a round pan, this technique embraces a high-temperature bake to caramelize sugars on the surface while keeping the center custardy. Adapting it to a loaf pan gives the classic flavors a different texture and presentation that works well for small gatherings and individual slices.
Seasonal Adaptations
In summer, top slices with macerated strawberries or stone fruit for bright acidity. In fall, serve with roasted pears and a drizzle of brown-butter caramel. For winter holidays, fold a teaspoon of orange zest into the batter and top with spiced caramel. Small adjustments like lemon zest or espresso powder can subtly change the profile without complicating the preparation.
Meal Prep Tips
Make the loaf a day ahead to allow flavors to develop and make slicing easier. Refrigerate overnight and slice just before serving. For entertaining, pre-plate slices with a quenelle of whipped cream and a few berries so you can focus on your guests rather than last-minute assembly. Use a warm knife cleaned between cuts for tidy presentation.
This loaf offers the drama of a burned top with the luxury of a custardy interior, and I hope you enjoy making it as much as I do. It has become a family favorite that feels special without being complicated, and each slice carries a bit of that glowing, toasted flavor I love to share.
Pro Tips
Bring cream cheese and eggs to room temperature to ensure a lump-free, silky batter.
Use a warm knife wiped between slices for clean edges when serving.
Chill the loaf for at least 4 hours or overnight to set the texture and improve sliceability.
Watch the oven during the last five minutes; the top should be deeply caramelized but not bitter.
This nourishing luxury burnt basque cheesecake in a loaf pan recipe is sure to be a staple in your kitchen. Enjoy every moist, high protein slice — it is perfect for breakfast or as a wholesome snack any time.
Tags
Luxury Burnt Basque Cheesecake in a Loaf Pan
This Luxury Burnt Basque Cheesecake in a Loaf Pan recipe makes perfectly juicy, tender, and flavorful steak every time! Serve with potatoes and a side salad for an unforgettable dinner in under 30 minutes.
Ingredients
Cake
Optional Toppings
Instructions
Prepare the pan and oven
Preheat oven to 450°F. Line a 9x5-inch loaf pan with parchment, leaving an overhang so the baked loaf can be lifted out easily.
Beat cream cheese and sugar
Beat room-temperature cream cheese with granulated sugar until smooth and lump-free, scraping the bowl frequently to ensure even texture.
Add eggs
Add eggs one at a time, mixing until each is fully incorporated to maintain a stable emulsion and prevent breaking the batter.
Add cream
Mix in heavy cream gently until combined, avoiding overbeating to prevent excess air that can cause cracking during baking.
Fold in flour and salt
Sift flour and salt over the batter and fold in with a spatula until no streaks remain, keeping the batter dense and creamy.
Bake for caramelized top
Pour batter into the pan and bake at 450°F for 20 minutes, then reduce oven temperature to 350°F and bake an additional 25 to 30 minutes until top is deeply browned and center is slightly wobbly.
Cool and chill
Cool on a wire rack to room temperature, then refrigerate at least 4 hours or overnight to set the texture and improve sliceability.
Unmold and serve
Lift the loaf out using the parchment overhang, slice with a warm clean knife, and serve with whipped cream, berries, and a drizzle of caramel as desired.
Last Step: Please leave a rating and comment letting us know how you liked this recipe! This helps our business to thrive and continue providing free, high-quality recipes for you.
Nutrition
Did You Make This?
Leave a comment & rating below or tag
@magicmealideas on social media!
Categories:
You might also like...

Air-Fried Pizza Rolls
Crispy on the outside, gooey on the inside: easy air-fried pizza rolls made with pizza dough, mozzarella, pepperoni, and a quick Italian seasoning — perfect for snacking or feeding a crowd.

Air-Fried Rice Paper Noodle Rolls
Crispy, light rice paper rolls filled with vermicelli, vegetables and tofu or shrimp, air-fried to golden perfection for a healthy snack or shareable appetizer.

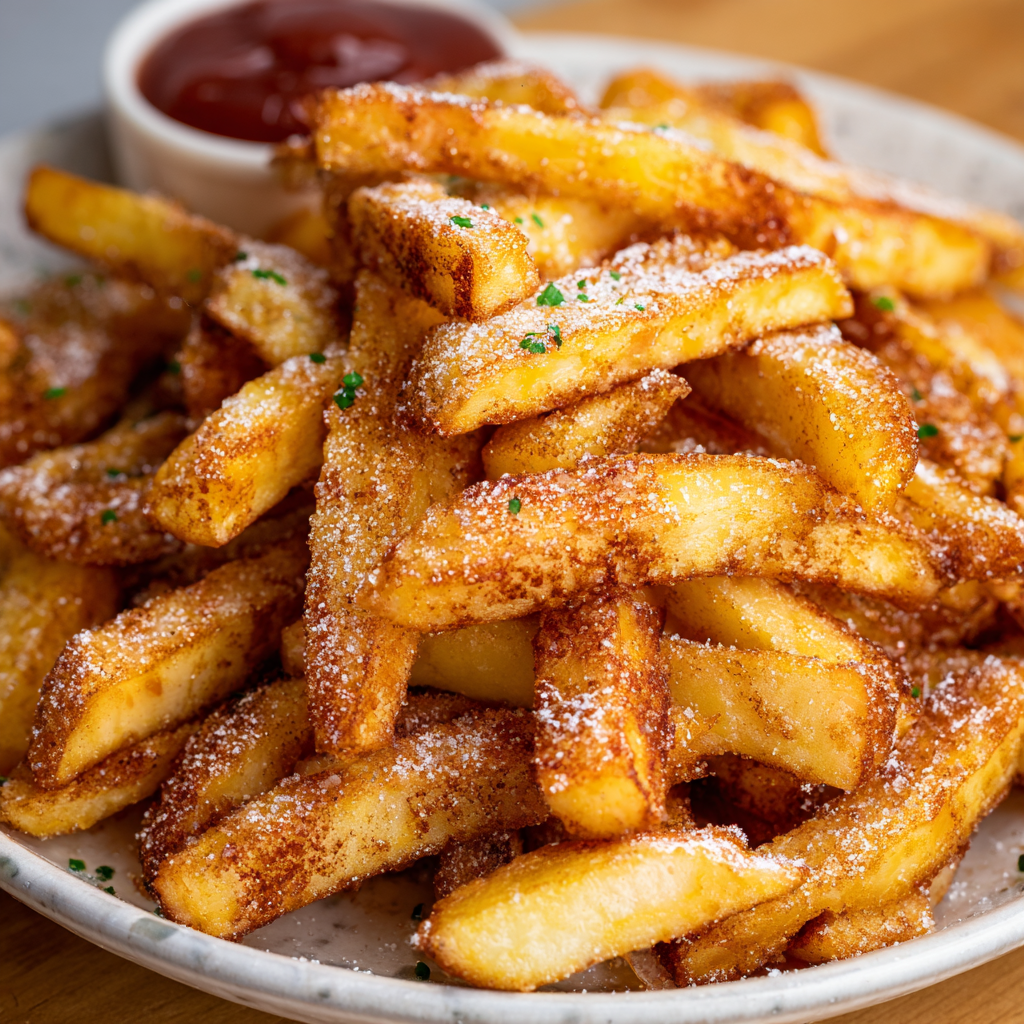
Air Fryer Apple Fries
Crispy, cinnamon-sugar coated apple sticks made in the air fryer — a quick, family-friendly treat that tastes like baked apple pie in every bite.
Did You Make This?
Leave a comment & rating below or tag @magicmealideas on social media!
Rate This Recipe
Share This Recipe
Enjoyed this recipe? Share it with friends and family, and don't forget to leave a review!
Comments (1)
This recipe looks amazing! Can't wait to try it.
Comments are stored locally in your browser. Server comments are displayed alongside your local comments.
Hi, I'm Chef!
What's Popular
30-Minute Meals!
Join to receive our email series which contains a round-up of some of our quick and easy family favorite recipes.